___________
As first home buyers in the booming Sydney housing market, it quickly became clear that finding a home that we could afford with all the contemporary design features we loved just wasn’t going to happen, so buying a “renovator” became more of an inevitability rather than a choice.
George Skentzos
__________
After almost a year of searching, my wife Tenielle and I finally found a home we could call our own with all the right elements to create an affordable yet modern home ideal for entertaining and open-plan living.

__________
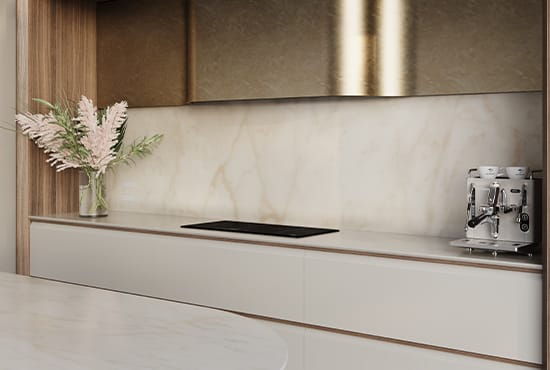
An obsessive habit of mine was to take the floor plan of the real estate listing and try to create a modern layout in Photoshop, so before we’d even signed on the dotted line, we already had a solid idea of what we wanted to achieve with this renovation. The main criteria were to have a modern open-plan living area, with seamless access to an outdoor entertaining area – and a new Caesarstone® kitchen, of course!

__________
The home was originally a modest three-bedroom residence built in the 1950s with an extension added sometime in the 1960s, including a new kitchen and small fourth bedroom/study.
Our first job to make the house a bit more “homely” was to transform the bedroom in preparation for the long haul of living on a construction site. We ripped up the carpet to reveal polished timber floors, painted the walls and wardrobe trim in a more modern colour and added some new furniture.

___________
With that first bit of renovating done, the real work could begin! With the help of our builder, the first job to tackle was opening up the access from the front to the rear of the home which could only be accessed through one of two narrow doorways at opposite ends of the room. A nib wall inconveniently close to the doorway meant walking to the back of the home followed an S-shaped path, making the area feel dark and cramped. So both doorways had to go in favour of one large opening.


__________
The blue tape lines on the floor were laid down about a week before construction so we could visualise where the final doorway would be. We wanted it to be small enough to still separate the front and back living areas and positioned in a way that the front living area could be transformed into a bedroom in future if necessary.

__________
By this point, we were in two minds about removing the entire wall to have one large open plan living area for the entire house length but decided that two separate living areas would be more practical in the long term.

__________
Opening up the doorway and removing the nib wall immediately made the home feel much larger and more open, and we also managed to sneak in a bigger hallway closet as a bonus!


_________
With the new doorway in place, we now had a direct line of sight from the front to the back of the house. It might be bad “feng shui”, but it creates quite an amazing first impression when people walk through the door expecting to see something much smaller.

___________
With the home sitting on a block with a gentle slope, the back extension part of the home included a small step in the centre of the room with a balustrade on either side. We decided to extend the step the entire way across the room, which was quite a simple job thanks to a conveniently located floor joist!

__________
Obviously, the previous owners had outgrown the home, which is why a fourth bedroom was awkwardly incorporated next to the kitchen. Our plan was to clear the entire back section of the house, including the bedroom, kitchen and a built-in pantry, then install two big bi-fold doors which would open up onto the backyard and eventually a large deck area for outdoor entertaining.

__________
We measured up the new bi-fold doors, and after about a month, they arrived then it would be a frustrating week of waiting before they could be installed!

__________
We did what we could to prepare the area as much as possible by removing plasterboard from the walls and ceiling, then it took three builders just one day to demolish the rest of the area, ready for the new structural beams and bi-fold doors.

__________
The back of the home gets beautiful sunlight in the morning, and believe it or not, the yard was so overgrown when we bought it that you couldn’t even see the back fence!

__________
With the structure, we could see our dream come to life for the first time. The big openings for the bi-fold doors completely transformed the look and feel of the home from a cramped space to the beginnings of a modern family entertainer!
__________
Discover More of George & Tenielle:
Instagram: @tenielle.george


__________
After an unsettling night’s sleep with the entire back of our home exposed to the elements, the bifold doors were installed the next day. We opted for a gloss white finish with an insulated glass coating to help keep the home cool in summer.

__________
It was a bit of a painful task replacing the external aluminium weatherboard cladding, but after a bit of work by sunset, it looked as good as new!

__________
With the major structural work now complete, we could move on to the interior and begin turning the home from the construction site we had come to know over the past few months back into a real home.
We weren’t afraid to get our hands dirty, so the next job to tackle was hanging the new plasterboard on the walls and ceilings – about forty sheets. If you need proof that we are first-time renovators, this is it! The plasterer was mortified when he saw our plasterboarding efforts! As we would find out, the norm is to use as large sheets as possible to minimise joins, but we just went for the standard 2400 x 1200 sheets. So whereas a proper plastering job might have half a dozen butt joints, our job had more like 30!

___________
Nevertheless, the only repercussion seems to have been more work for our plasterer. Otherwise, the job is flawless!

__________
We chose the standard Dulux Vivid White for the walls to create a bright blank canvas for what would become the main living area of our home.
With most of the internal work done, we were ready for the kitchen! But that all comes in Part Two of our renovation!
__________


